The production process and tutorial of handmade wooden spoons
author: David
2023-04-21
Wooden tableware has become increasingly popular in recent years due to its natural beauty, durability and sustainability. Custom Box Wooden Cutlery goes a step further, presenting a set of high-quality wooden cutlery in elegant packaging to enhance the dining experience. Available in different sizes and designs, these custom boxes can accommodate a variety of dinnerware sets and can be personalized to match any occasion, making them perfect for gift-giving. Wood tableware itself has many advantages, including being lightweight, easy to clean, and soft on delicate surfaces. In addition, it is sustainable, environmentally friendly, and biodegradable, making it an excellent alternative to traditional plastic or metal cutlery. Bring exquisite custom boxes of wooden tableware to your table for a natural and environmentally friendly dining experience. Contact us if you want to add character and sales to your restaurant, party or supermarket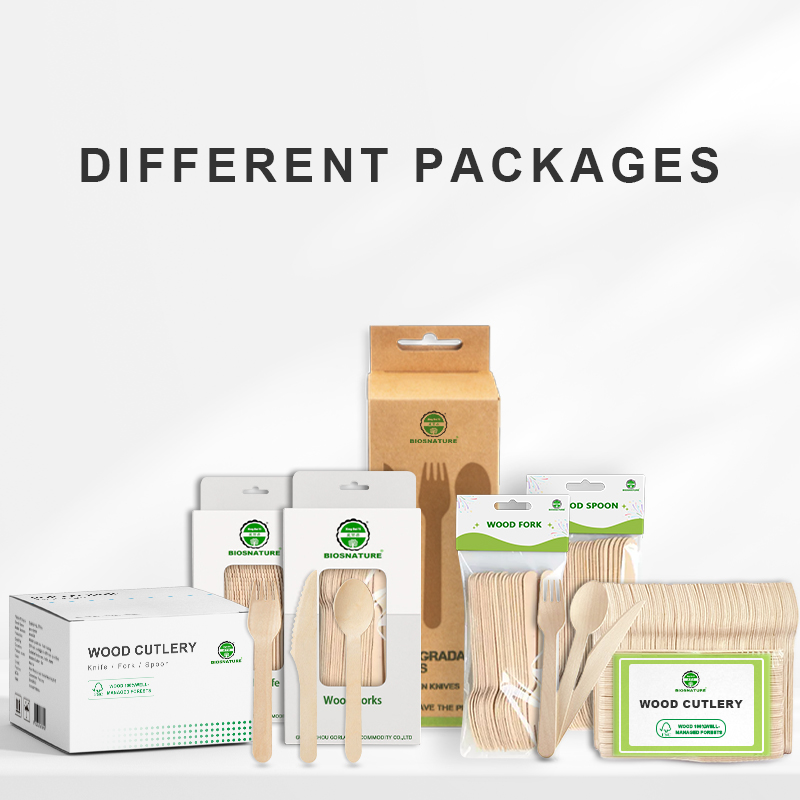
The production process and tutorial of handmade wooden spoons
Click Times: 100 Update Time: December 24, 2020 09:07:12 Source: www.woodnicestreamstick.com 【 Close 】 Share:
Handmade wooden spoons, when a small piece of intact wood slowly transforms into a delicate or coarse mineral spoon, the entire process is captivating.
Preparation required:
1. A piece of wood (Walnut wood is used in the tutorial, but any hard wood can actually be used)
2. Engraving tools: carving knives, spoon shaped chisels
3. Sandpaper: Sandpaper with different densities (320180 and 120grit)
4. File (WoodPasp doesn't matter if it doesn't)
5. Wipes, edible natural oil (walnut oil, olive oil is OK)
The process and method of making handmade wooden spoons:
1. Using a pencil, draw the shape of the spoon you want on the wood, and then use a hand saw to cut the spoon off along the line.
2. According to your needs, start digging the middle of the spoon. It is recommended not to dig too deep. The depth of the spoon bottom, whether it is curved or flat, depends on your needs.
When carving, it is recommended to fix it on the table with even force.
3. After roughly carving the part of the spoon, use a pencil to draw the shape of the outer edge of the spoon and the handshake part
4. Start working on the outer edge of the spoon and the handshake part, using a knife to gradually cut out the shape of the spoon handle from top to bottom, and then use a file to polish it, especially in the curved position.
A file is not necessary, but it can have circular edges.
5. Now that the approximate shape has come out, continue to scrape the inner wall of the spoon with less force, in order to better control the shape of the spoon. The bottom will also be smoother, and the final surface effect will be better.
6. Now use sandpaper to polish, this is a meticulous task. Use sandpaper 300 (600 is also acceptable), 180, and 120 in sequence to polish, and the spoon will gradually become delicate and round.
7. Finally, add natural cooking oil with a cloth, evenly cover the spoon, and wait for it to dry. Oil can be applied once or 2-3 times.
8. A handmade wooden spoon was born like this. You can admire it, but the better way is to use it.
Click Times: 100 Update Time: December 24, 2020 09:07:12 Source: www.woodnicestreamstick.com 【 Close 】 Share:
Handmade wooden spoons, when a small piece of intact wood slowly transforms into a delicate or coarse mineral spoon, the entire process is captivating.
Preparation required:
1. A piece of wood (Walnut wood is used in the tutorial, but any hard wood can actually be used)
2. Engraving tools: carving knives, spoon shaped chisels
3. Sandpaper: Sandpaper with different densities (320180 and 120grit)
4. File (WoodPasp doesn't matter if it doesn't)
5. Wipes, edible natural oil (walnut oil, olive oil is OK)
The process and method of making handmade wooden spoons:
1. Using a pencil, draw the shape of the spoon you want on the wood, and then use a hand saw to cut the spoon off along the line.
2. According to your needs, start digging the middle of the spoon. It is recommended not to dig too deep. The depth of the spoon bottom, whether it is curved or flat, depends on your needs.
When carving, it is recommended to fix it on the table with even force.
3. After roughly carving the part of the spoon, use a pencil to draw the shape of the outer edge of the spoon and the handshake part
4. Start working on the outer edge of the spoon and the handshake part, using a knife to gradually cut out the shape of the spoon handle from top to bottom, and then use a file to polish it, especially in the curved position.
A file is not necessary, but it can have circular edges.
5. Now that the approximate shape has come out, continue to scrape the inner wall of the spoon with less force, in order to better control the shape of the spoon. The bottom will also be smoother, and the final surface effect will be better.
6. Now use sandpaper to polish, this is a meticulous task. Use sandpaper 300 (600 is also acceptable), 180, and 120 in sequence to polish, and the spoon will gradually become delicate and round.
7. Finally, add natural cooking oil with a cloth, evenly cover the spoon, and wait for it to dry. Oil can be applied once or 2-3 times.
8. A handmade wooden spoon was born like this. You can admire it, but the better way is to use it.
The Advantages of Custom Packaging for Customized Bamboo Toothpicks
The Benefits of Bagasse Cutlery